How to Connect Your Cloudflare Account to the NEST Image Management Dashboard
5 min read · Written on January 3, 2026 · Updated on January 6, 2026
We are introducing a new feature in the NEST dashboard that allows organization owners to directly manage and update website images without relying on developers or designers. This feature gives you full control over your site visuals, speeds up updates, and reduces operational dependency.
To enable this feature securely, we require limited access to specific Cloudflare resources that already power your website. This article explains what information is required, why it is needed, and how to find it inside your Cloudflare dashboard.
All credentials you provide are end to end encrypted and securely stored on our servers. These values are never visible to our team and are used only to perform authorized actions on your behalf.
Why Cloudflare Access Is Required
Your website images are stored in a Cloudflare bucket and delivered through Cloudflare’s network. To allow image editing from the NEST dashboard, we need to:
Read images from your Cloudflare bucket
Upload replacement images
Optionally download the existing image for backup and rollback
Purge Cloudflare cache so updates reflect immediately on your website
We do not modify anything outside image assets and cache related to those assets.
Information You Need to Provide
You will be asked to provide the following Cloudflare details in the NEST dashboard:
Cloudflare Account ID
Cloudflare API Token
Cloudflare Access Key ID
Cloudflare Secret Access Key
Bucket Name
Zone ID
Some of these values may already be configured. You can update them at any time if needed.
1. Cloudflare Account ID
What it is
The Account ID uniquely identifies your Cloudflare account and is required to access account level resources such as storage buckets.
How to find it
Log in to your Cloudflare dashboard
Select any domain under your account
In the right sidebar, locate the Account ID
Copy and paste this value into the NEST dashboard
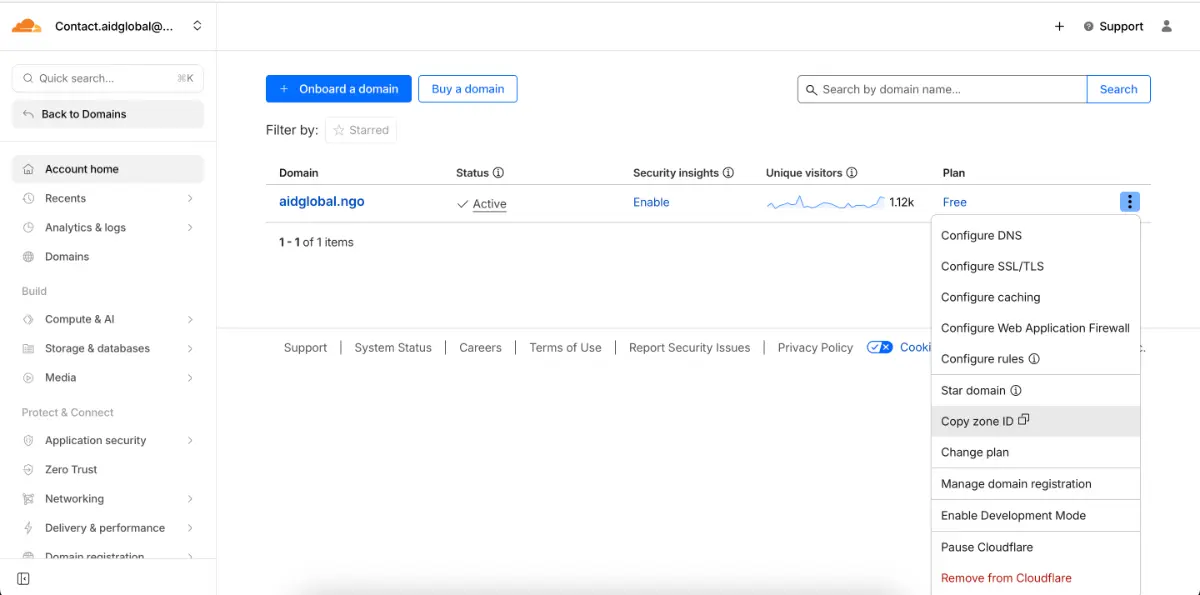
2. Cloudflare Zone ID
What it is
The Zone ID represents a specific domain in Cloudflare. It is required to purge cache when an image is updated so changes appear instantly on your website.
How to find it
Go to your Cloudflare dashboard
Locate your registered domain
Click the three dot menu next to the domain name
Select Copy Zone ID
Paste this value into the NEST dashboard
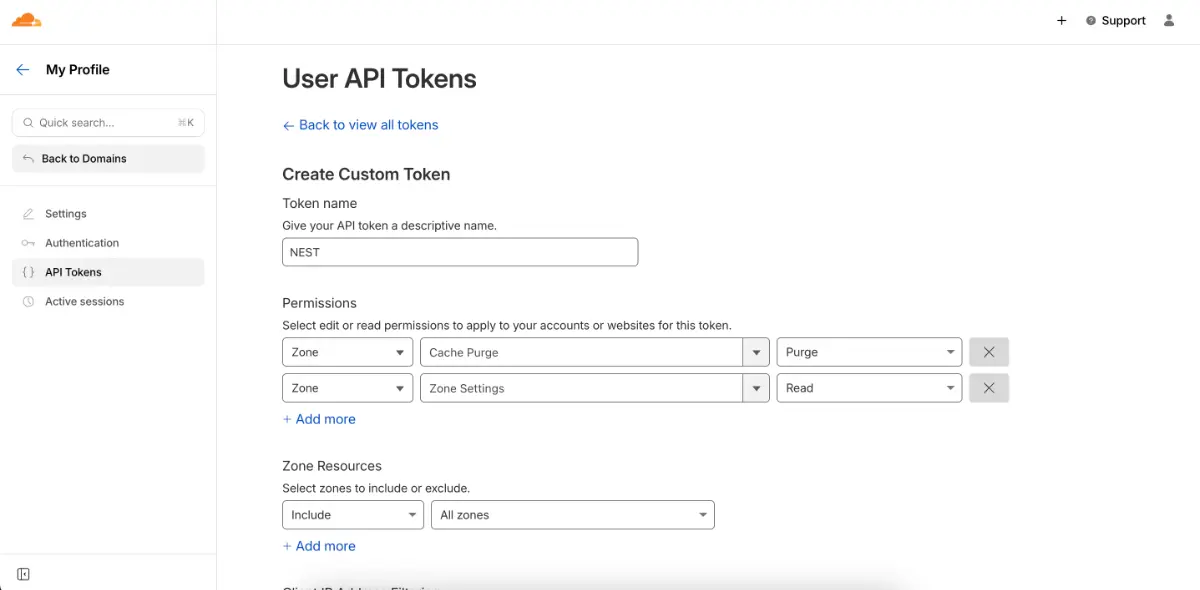
3. Cloudflare API Token
What it is
The API Token allows NEST to perform limited actions such as cache purging and reading domain level configurations.
How to create it
Visit your Cloudflare API Tokens page: https://dash.cloudflare.com/profile/api-tokens
Click Create Token
Choose Create Custom Token
Configure the token with the following permissions (as in image below):
Zone: Cache Purge with Edit access
Zone: Read access
Scope the token to the required account and zone
Click Continue to Summary
Click Create Token
Copy the generated token and store it securely
Paste the token into the NEST dashboard
4. Cloudflare Access Key ID and Secret Access Key
What they are
These keys are used to securely access your Cloudflare bucket where images are stored. They allow NEST to read existing images, upload replacements, and optionally download previous versions for rollback.
How to generate them
In the Cloudflare dashboard, go to R2 Storage
Navigate to Manage R2 API Tokens or Access Keys
Create a new access key
Save both the Access Key ID and Secret Access Key
Enter both values into the NEST dashboard
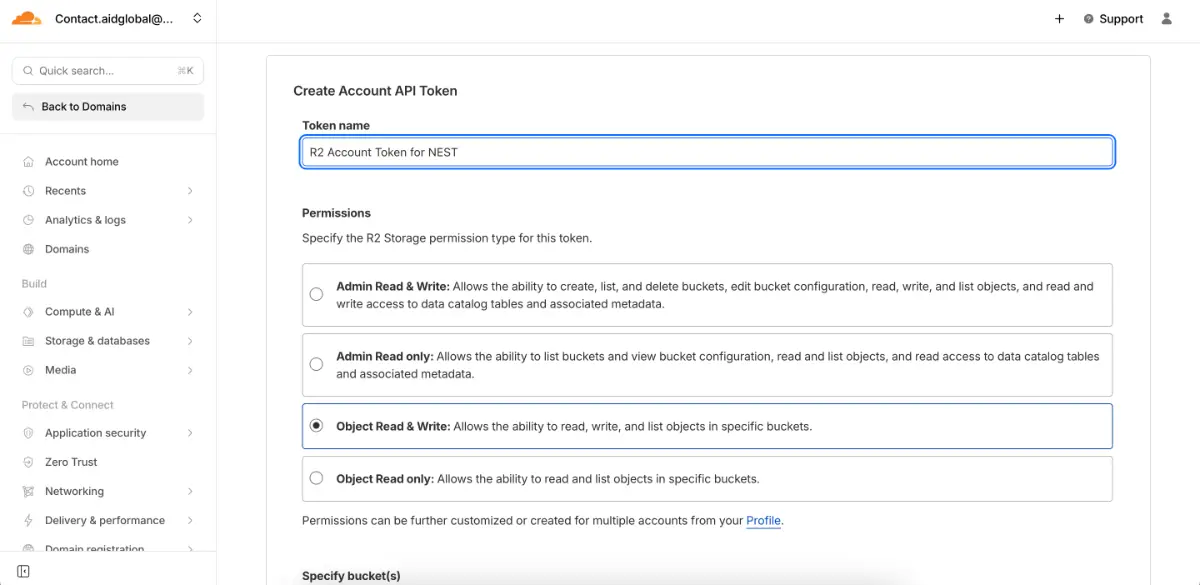
Important note: The secret access key is shown only once by Cloudflare. Make sure to store it securely.
5. Bucket Name
What it is
The bucket name identifies where your website images are stored in Cloudflare R2.
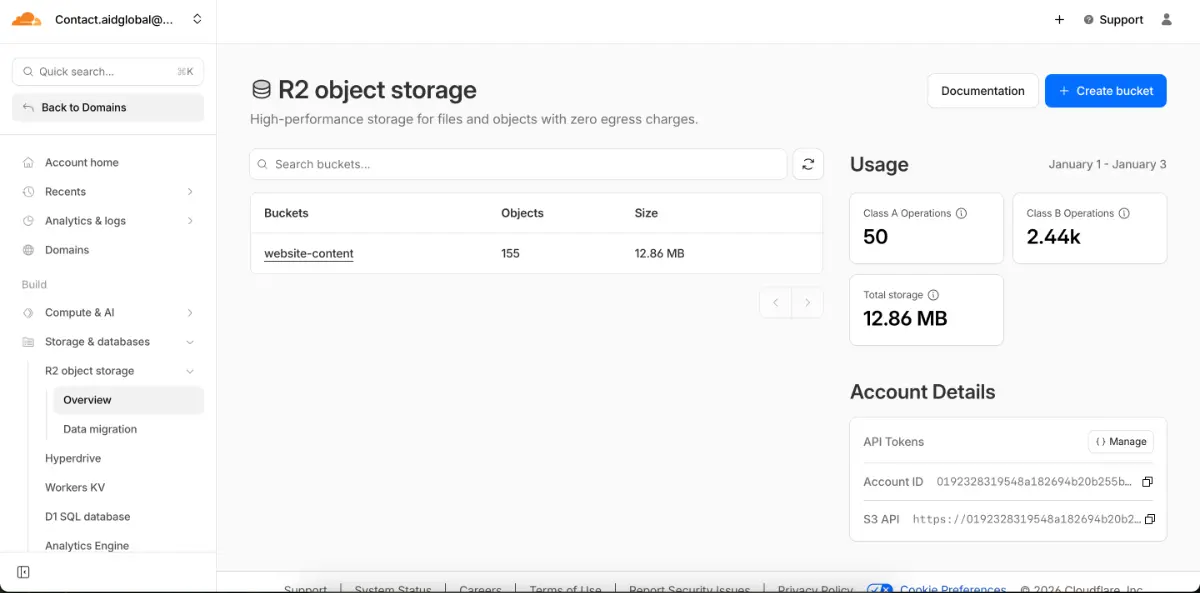
How to find it
Go to Cloudflare Dashboard
Navigate to R2 Storage
Select your bucket
Copy the bucket name exactly as shown
Enter this value in the NEST dashboard
6. Allowing CORS in your R2 bucket
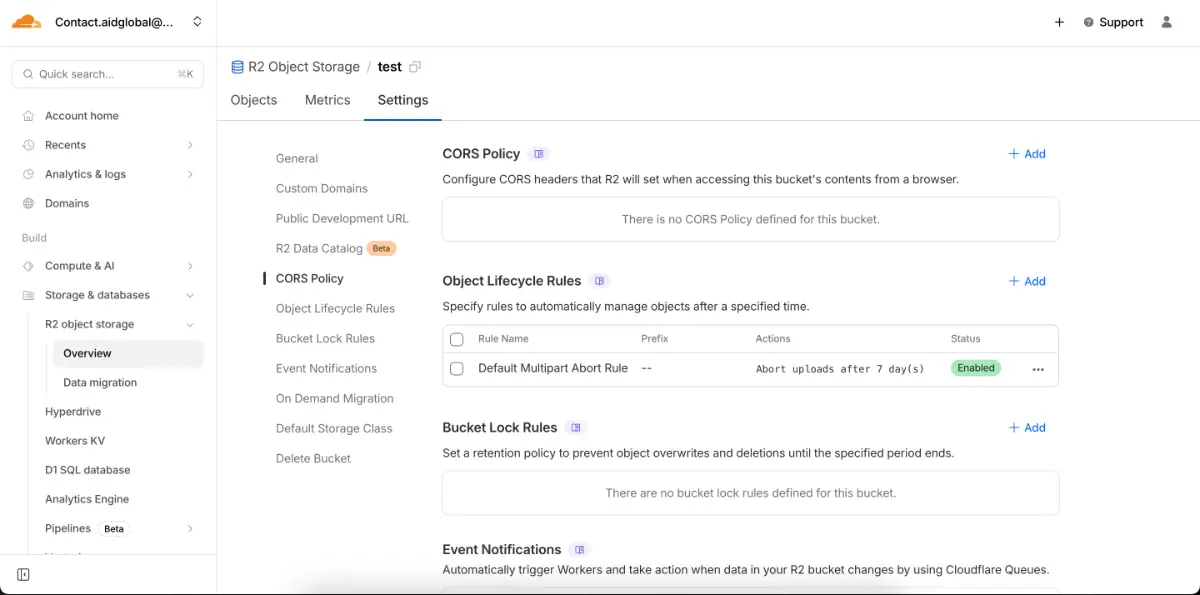
We need to be able to upload the images directly from your browser into your R2 bucket. So we need to setup this CORS permissions to tell the browser to allow the uploads from NEST's user. To allow this, Go to your bucket settings > CORS Policy > Add, and add the following policy.
[
  {
    "AllowedOrigins": ["https://k34a.vercel.app"],
    "AllowedMethods": ["PUT", "POST", "GET", "HEAD"],
    "AllowedHeaders": ["*"],
    "ExposeHeaders": ["ETag"],
    "MaxAgeSeconds": 3600
  }
]
How the Image Editing Feature Works
Once connected:
All images from your Cloudflare bucket are displayed in the NEST dashboard
You can click on any image to replace it with a new one
The previous image is optionally downloaded and stored as a backup
Cloudflare cache is automatically purged for the updated asset
Changes reflect immediately on your live website
If you ever need to revert an image, you can safely restore the previous version.
That being said,
All credentials are encrypted end to end
Tokens and keys are securely stored and never visible to our team
Access is limited to image management and cache operations only
No changes are made to other website resources
Summary
By connecting your Cloudflare account to the NEST dashboard, you gain direct control over your website images with instant updates and built in rollback support. This feature is designed to empower NGO owners and administrators to manage their sites independently, efficiently, and securely.
If you need assistance during setup, our support team is always available to help.