Guide: How to Connect Gemini AI to NEST Using Your Own API Key
4 min read · Written on January 3, 2026

Modern NGOs increasingly rely on AI to summarize reports, generate content, analyze data, and automate repetitive tasks. To ensure flexibility, privacy, and cost control, NEST follows a Bring Your Own AI approach.
This means your organization connects its own Gemini AI API key directly to NEST. Your data stays under your control, and you decide how Gemini is used within your workspace.
This guide walks you through what Gemini connectivity means, why NEST uses this model, and how to generate and connect your Gemini API key step by step.
By the end of this guide, Gemini AI will be fully enabled inside your NEST dashboard.
What Is Bring Your Own AI in NEST
Bring Your Own AI allows your organization to plug in its own AI provider credentials instead of relying on shared or third-party keys.
With Gemini AI connected to NEST, your team can:
Generate summaries, reports, and content using AI
Automate administrative workflows
Maintain full ownership of usage limits and billing
Ensure better privacy and isolation between organizations
Each NEST organization connects its own Gemini API key. Keys are never shared between tenants.
What You Need Before You Start
Before connecting Gemini AI, make sure you have:
A Google account
Admin access to your NEST dashboard
Permission to create API keys in Google AI Studio
No technical background is required. The setup takes only a few minutes.
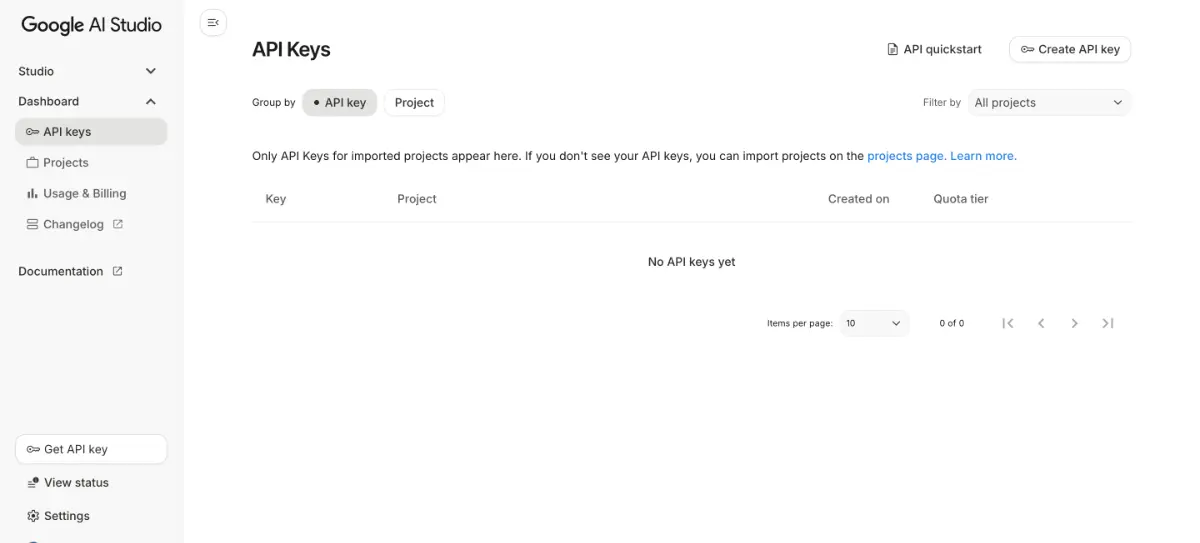
Step 1: Open Google AI Studio
Gemini API keys are created using Google AI Studio.
Open Google AI Studio in your browser
Log in using your Google account
Navigate to the API Keys section
This is where Google allows you to create and manage Gemini API credentials.
Step 2: Create a Gemini API Key
Once inside the API console:
Click the Create API Key button
Give the key a name. Any name is fine
Select an existing Google Cloud project or create a new one
Confirm by clicking Create Key
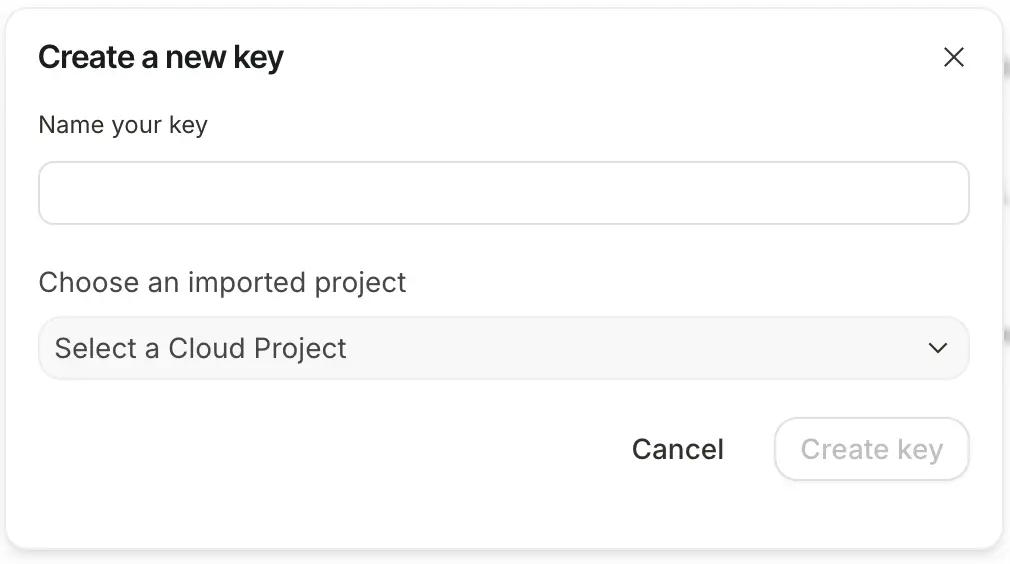
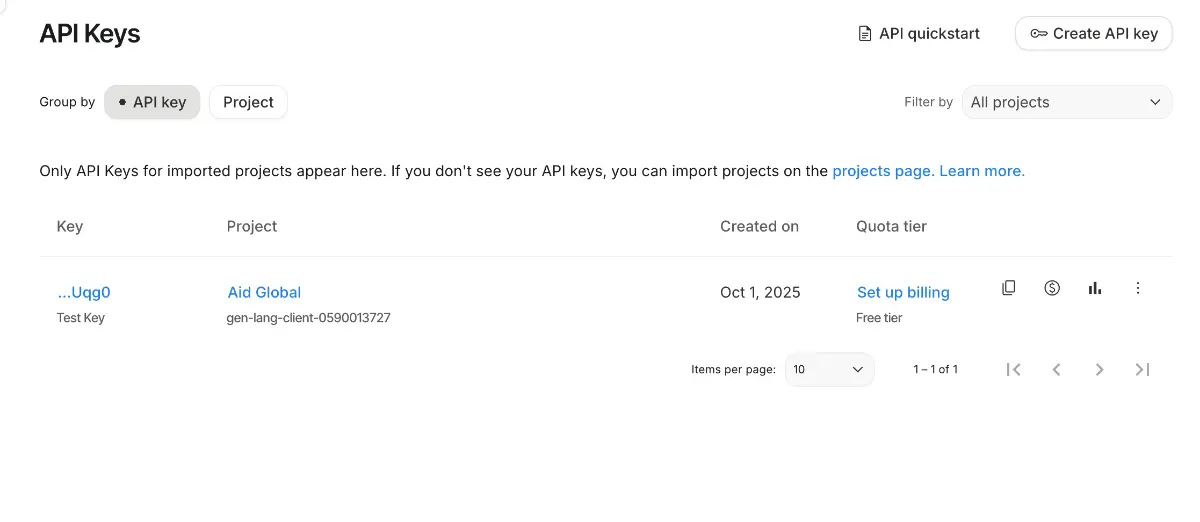
Your new Gemini API key will appear in the list immediately.
Step 3: Copy and Store the API Key Securely
Copy the generated API key.
This key grants access to Gemini AI on behalf of your Google account, so it should be treated like a password. Do not share it publicly or store it in unsecured documents.
Step 4: Add the Gemini API Key to NEST
Now open your NEST admin dashboard and navigate into your organization dashboard.
Go to the settings > AI
Paste your Gemini API key into the provided field
Save the configuration
Once saved, NEST will securely store the key and begin using your own Gemini API key for AI-powered features.
Step 5: Test Gemini AI in NEST
After connecting the key, try using any Gemini-powered feature inside NEST, such as:
Content generation
SEO optimization
AI-assisted workflows
If the feature responds successfully, your Gemini integration is complete.
Understanding Gemini Usage Limits
Google provides a free usage tier for Gemini AI. For most NGOs and small to medium teams, the free quota is more than sufficient.
If you encounter temporary errors, it may be due to:
Reaching the monthly free usage limit
Making too many requests in a short period
In such cases, Google may temporarily slow requests or stop responses until limits reset.
If your organization needs higher usage, you can optionally enable billing in your own Google account. This is entirely optional and controlled by you, not NEST.
Best Practices for Gemini Connectivity
Use one API key per organization
Do not rotate or delete the key without updating NEST
Limit API key access within your Google account
Monitor usage in Google AI Studio if needed
You can update or replace your Gemini API key at any time from the NEST dashboard.
Why NEST Uses Bring Your Own AI
NEST is built for NGOs that value transparency, security, and control. By allowing organizations to bring their own Gemini API key, NEST ensures:
No shared AI usage across organizations
Clear ownership of costs and limits
Better data isolation and compliance
Flexibility to scale as your needs grow
This approach aligns with NEST’s mission to be a secure, professional, and future-ready digital backbone for modern NGOs.
Once connected, Gemini AI becomes a powerful assistant inside NEST, helping your team work faster while keeping full control over your data and AI usage.